


GrayGrids Team
in Tutorial
Updated on: 9/1/2023
How to Install HTML Templates on Different Platforms ?
Are you ready to refresh the look of your website? Installing HTML templates is an excellent way to make a site look modern and stunning. The importance of visually appealing and functional websites must be addressed as the digital landscape continues evolving. HTML templates are the foundation for creating attractive web pages, making them crucial in web development.
In this detailed guide, we’ll go through the step-by-step process of seamlessly installing HTML templates on different platforms. Whether you’re using cPanel, FTP, GitHub Pages, a local development environment like XAMPP, or manually setting up a static website, we’ll cover all in this article.
Note: Feel free to jump straight to the platform you’re interested in.
Ready for a website upgrade? Follow these essential steps to install HTML templates on various platforms seamlessly. But before that, we will review some general requirements and then move into platform-specific details.
General Requirements:
1. Understand Your Platform:
First, familiarize yourself with the platform you’re using. Different platforms have different requirements and processes to install HTML templates.
2. Choose a Compatible HTML Template:
Choose an HTML template that smoothly integrates with your platform. Ensure it’s responsive, performance-optimized, and compatible with your CMS or website builder version.
3. Download and Extract the HTML Template:
Download your chosen template and extract the ZIP file. Look for a folder with HTML, CSS, JavaScript files, and image folders. Understanding the template structure will facilitate seamless integration.
4. Connect to Your Hosting Environment:
Connect to your hosting environment using FTP (File Transfer Protocol) or a hosting file manager for a self-hosted platform or a custom website. Upload the extracted template files to the appropriate directory. You can install it directly from the admin panel on CMS-based platforms like WordPress or Joomla.
Installation Steps:
Let’s explore the step-by-step process for each platform:
cPanel ( Generic )
Installing an HTML template in cPanel is simple because HTML templates are static files and don’t need server-side processing. Here’s a quick guide:
Step to Install HTML template in cPanel
Access cPanel: Log in to your cPanel account using your credentials.
Open File Manager: Find and click on the “File Manager” icon in your cPanel dashboard.
Navigate to Web Root Directory: Go to the web root directory, usually named “public_html” or “www“
Upload HTML Template: Select the HTML template files on your computer. Click the “Upload” button in the file manager and choose the files from your local device.
Extract Zip Files (if needed): If your template is in a zip file, right-click and select “Extract.”
Organize Files (Optional): If your template includes CSS, JavaScript, or image folders, place them in the web root directory correctly.
Verify Installation: Open a browser and visit your website URL to confirm the correct installation of the template.
Via Using FTP (Generic )
1. First, If you don’t have your template on your computer, download a template to get started; when the download/purchase is complete, you will get a package like this screenshot (after unzipping).
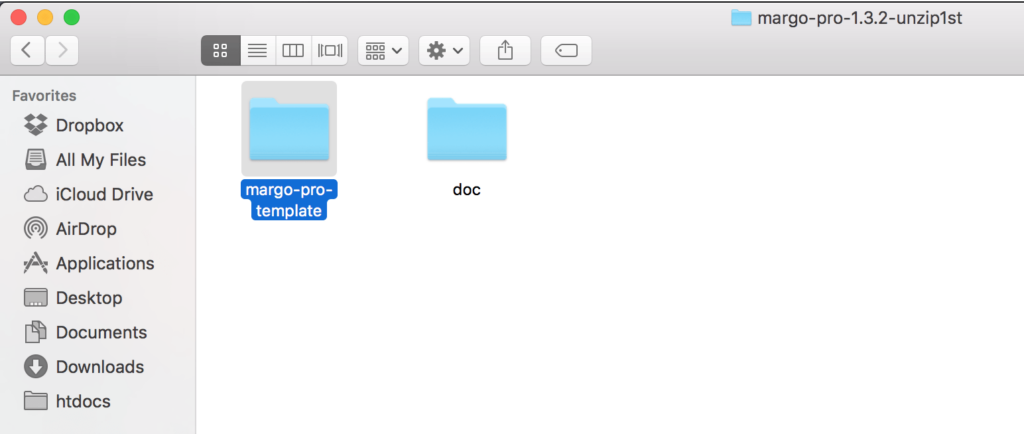
2. The package comes with docs and other add-ons, so unzip the download package, and you’ll find a folder with all template files, like the above screenshot.
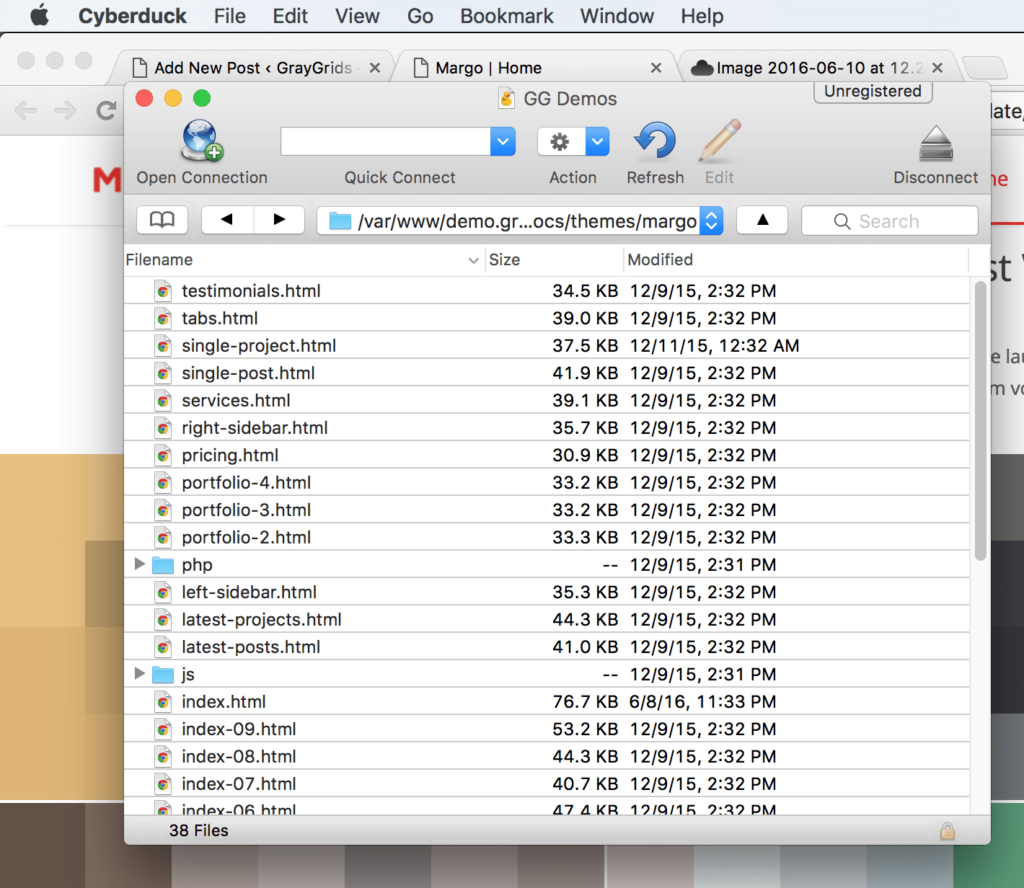
3. Now, login to your hosting control panel or FTP client, such as FileZilla, CyberDuck, etc., and upload template files on your server root.
4. Once all files are uploaded, go to www.yoursite.com/index.html. You can see your homepage; make sure the initial page is named index.html
3. Static Website (Manual Setup):
If you want to install an HTML template on a static website without server-side processing or a database, then the process is very simple ( you do it via the FTP method or cPanel ). Here’s a step-by-step guide for manual setup.
Steps to Install HTML Templates on Static Website:
Prepare HTML Template: Ensure your HTML template is organized, with an index.html file as the main entry point. Include CSS, JavaScript, and image folders.
Access cPanel: Log in to your cPanel account.
Open File Manager: Locate and click the “File Manager” icon in cPanel.
Go to Web Root Directory: Navigate to the web root directory, often named “public_html” or “www“
Upload HTML Template: Now upload your HTML template files using the “Upload” button in File Manager.
Extract Zip Files (if applicable): If your template is in a zip file, extract its contents within the web root directory.
Visit Your Website: Open your web browser and enter your domain name to verify that the HTML template is installed correctly.
Voila! You have successfully Installed the HTML Template.
4. GitHub Pages
Installing an HTML template on GitHub Pages is relatively straightforward, as GitHub Pages is designed to host static websites. Here’s a step-by-step guide:
Steps to Install HTML Templates on the Github Page:
Create a GitHub Repository: Start by creating a new repository on GitHub( By Using + Sign).
Upload Files: Upload your HTML template files to the repository ( Manually or via CLI).
Commit Changes: Commit the changes to the repository.
Access GitHub Pages Settings: In the repository, go to “Settings.”
Set Source Branch: Under the GitHub Pages section, choose the main branch or another branch as the source.
Save Settings: Save the changes to activate GitHub Pages for your repository.
Verify Installation: Visit the GitHub Pages URL (usually username.github.io/repository) to ensure the HTML template is correctly installed.
Voila!!
Local Development Environment (e.g., XAMPP)
Dive into the world of local development environments with XAMPP. This section provides a detailed guide on installing HTML templates locally and setting up XAMPP for HTML template development.
Steps to Install HTML Templates with XAMPP:
Install XAMPP: Download and install XAMPP.
Start XAMPP: Launch the XAMPP control panel and start the Apache server.
Navigate to htdocs Folder: Locate the “htdocs” folder in the XAMPP directory.
Create a New Project: Make a new folder for your project within the “htdocs” directory.
Upload HTML Template Files: Copy and paste your HTML template files into the project folder.
Access Localhost in Browser: Open your web browser and go to “localhost/your_project_folder.”
Verify Installation: Confirm that the HTML template is correctly installed and displayed on your local development environment.
Editing a Template
Before all that, you have to edit your template and place your content by replacing old demo content. In this case, you will need a code editor such as – VScode, Sublime Text, etc. When template editing is done using the editor, save the files and folder and upload template files on the live server.
Conclusion
In conclusion, We have gone through the guide on How to install HTML templates on various platforms. Each platform comes with its unique set of features and customization options. Tailor your HTML template installation based on the specific requirements to create a stunning and personalized website.
Whether you’re running a blog on a self-hosted static HTML site or an e-commerce store on Shopify, these steps will guide you toward a visually appealing online presence.
If you are still confused about any steps, feel free to comment. We are here to help you.


